Showing posts with label heirloom. Show all posts

Wednesday, April 15, 2015

POSTAGE STAMP Wedding Quilt #8

I finished hand quilting this wedding quilt for my grand nephew, Jack. He is only 10 but my goal is to make a queen or king quilt for each of my 4 grandchildren and my sister's 7. They range in age from 13 to 2 weeks. I have 3 more to make. 


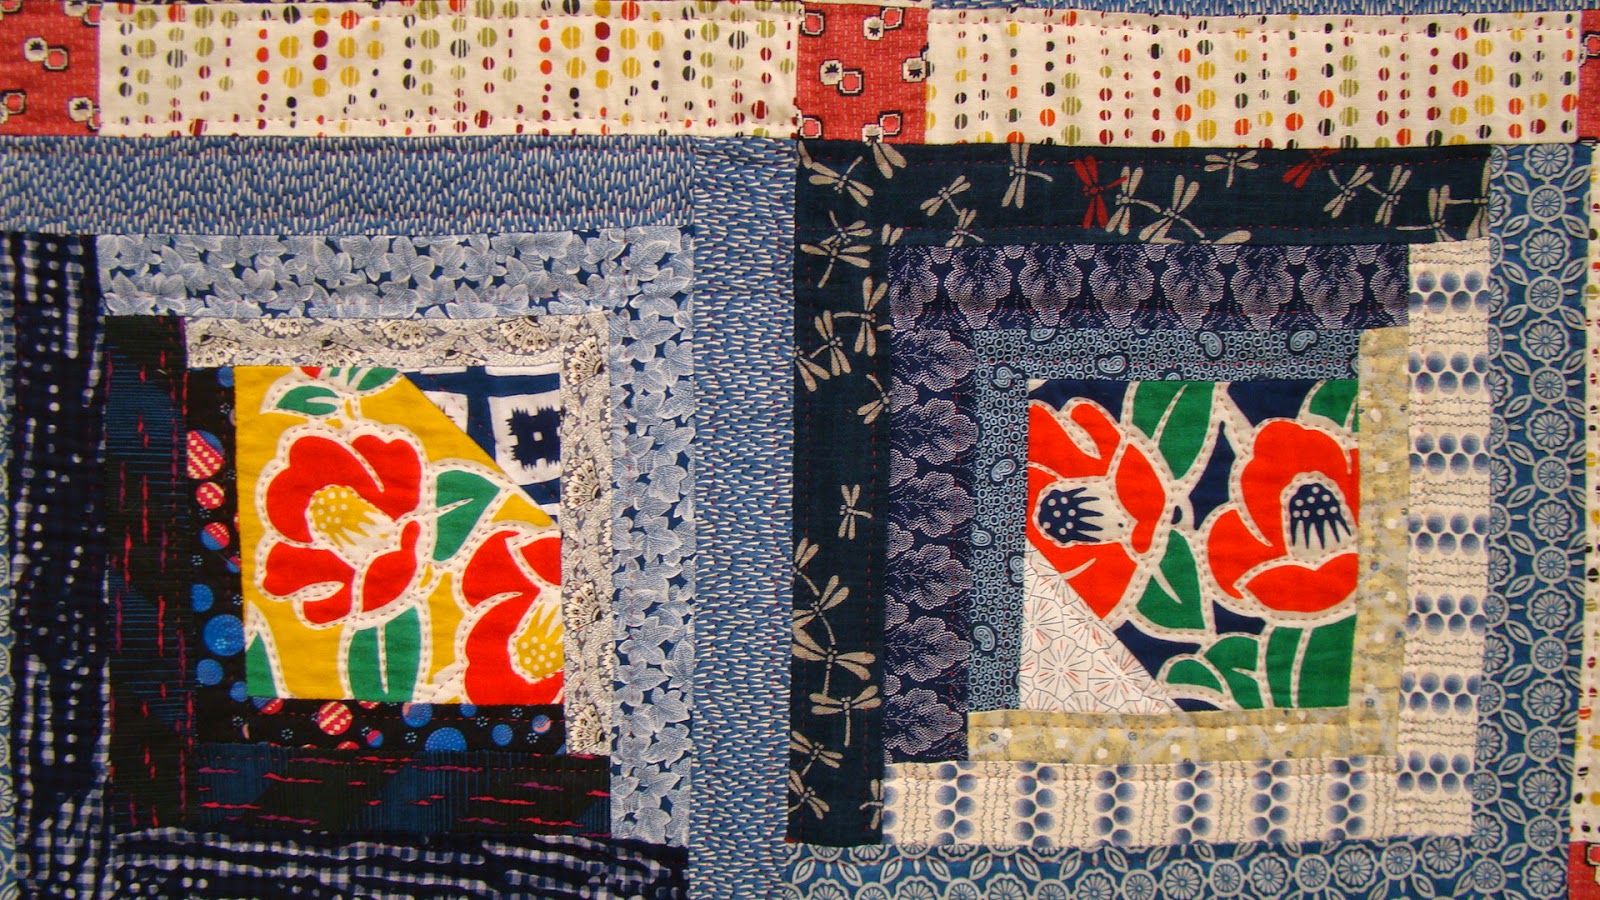
The white spaces were quilted with a traditional motif. 


For the rest of the quilt, I followed the diagonal points of the squares, quilting every other row. I thought I would quilt every row but I soon realized that I didn't have the stamina nor did I think it was necessary.


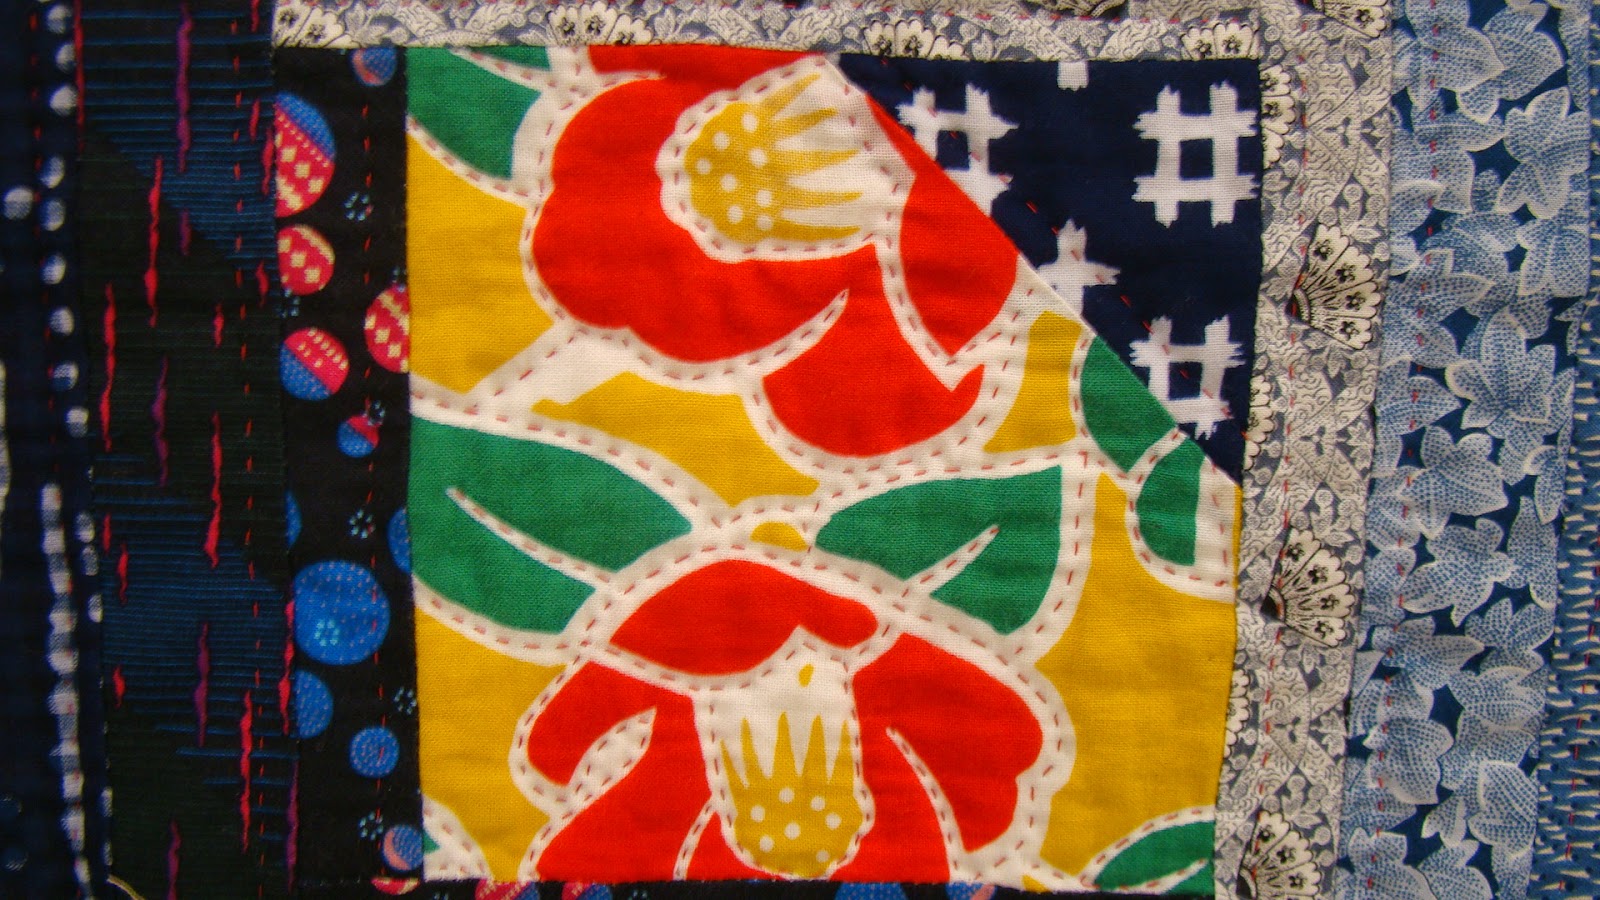
 It's fun to look at the fussy cut squares and
 find the prints pictured.


I read online when storing quilts, they should be folded on the basis to avoid permanent creases. They are also stored in fabric bags (never plastic). I use large complementary laundry bags from hotels. 

Friday, October 24, 2014

Ready for Hand Quilting


I was amazed that this quilt top went together so fast. With careful directional pressing, the seams locked together and lined up perfectly. I can now take my time hand quilting a grid diagonally across squares and add a motif in the open white spaces.


Monday, October 6, 2014

Postage Stamp, I am really quilt crazy


I saw this quilt in an antique store and I knew that I had found my next wedding quilt pattern. So....


I gathered scraps, asked friends and went through my stash. I cut 2" squares so my finished square is larger than the standard postage stamp of 1".  I cut 2 of each which I didn't realized would be very helpful in assembling the blocks later. I used all kinds of prints, some being fussy cut, and then stored them by color totaling 4000 squares.


I arranged the layout (2 squares together) on felt, covered them with a sheet square. I was able to fold and transport this sandwich and they stayed put until I was ready to sew.


I could sew one block at a time and still have the second layout in place to refer to. The decision to cut 2 turned out to be a great accident. Here's the project in progress. Only 13 more blocks to make a king size. I am quilt crazy.

Friday, September 19, 2014

"HEXAGON JEWELS" Wedding Quilt #7

This quilt will be set aside for Lauren's wedding day, age 10, my sister's granddaughter.


On my bucket list was to make a kaleidoscope quilt. I found this book, Precision Patchwork for Scrap Quilts by Jeannette Muir, in a used book store with 8 different hexagon designs.


 I had already purchased (on sale) these coordinating fabrics with stripes, repetitive prints and large focus designs. It took larger amounts of fabric because they needed to be fussy cut. The finishing touch that tied it all together were the triangles, an idea that came from Eleanor Burns


My goal is to make all of these wedding quilts queen or king size and to hand quilt them. So far so good. 


There was only 6 yards of the perfect backing fabric so "killed 2 birds with one stone";  I was able to use up left overs and add to the width of the backing. 


Thursday, September 11, 2014

"IRORI" Wedding Quilt #6

"IRORI", Japanese for the recessed hearth in traditional homes. These open fire pits are surrounded by tatami mats, arranged in auspicious pattern. This modified Log Cabin pattern came from one of my favorite books EAST QUILTS WEST, by Kumiko Sudo. I was able to use the last of my vintage and modern fabrics from Japan mixed with US fabrics that resemble Japanese style prints.


This wedding quilt is for my grandnephew, Adam, age 10. 


I am working on quilts for my sister's 7 and my 3 grandchildren. I've been making them now while my health is good and my hands still work. They are stored in breathable bags and marked with each child's name. Each one is meant to be an heirloom therefore I have chosen traditional designs. I know they will be appreciated because each of these children have received multiple quilts from me and they are used, loved and new ones requested as they have grown into their next stage of childhood.


Like the others, this quilt is King size, machine pieced and hand quilted. The border is quilted with pearl cotton in Sashiko style and designs.


Wednesday, January 15, 2014

DRUNKARD'S PATH from Scraps, WEDDING QUILT #5

Autumn, my grandniece, will be the recipient of this quilt. She is only 12, so it is stored in a cloth bag for now with a label telling her that it was made with love by her Aunt Janet.


This had been on my to do list for years. I found this different adaptation using multiple prints of light and dark instead of the traditional 2 color design. The original quilt size is 54" x 66" but I added extra blocks to make it king size. I started by collecting scraps from various sources, cutting no more than 12 of each shape from both light and dark prints. Part way into the cutting I realized that the pattern called for more light scraps than dark. I wasn't going to discard the extras so I made the outer squares the reverse of light and dark. You may notice the difference or not. 

I chose to hand piece the curves because of their size but also because I was laid up with foot surgery. The blocks were machine pieced.


In planning the layout, I used 12'x12' scrapbook paper to arrange the small squares. I rolled masking tape and fixed them in place on the paper until ready to sew each block. By laying out all the squares first I achieved a balanced design. 


The repeat of the border fit perfectly at the corners even with increasing the size. I finished by hand quilting circles that outlined the curves.


Here's the pattern if you'd like to try this. Just click on the pictures to print the actual size.


Friday, April 26, 2013

FANCY DISH finished, Wedding quilt #4


This quilt is for my grandniece, Vanessa for her wedding day. She is only 12, so I'm planning ahead. Who knows if I can still make these king size quilts when the time comes.


I knew that the binding on this scallop and point edge would be a challenge but I didn't realize how much of a learning curve it would be.

I have put a tutorial together to help those who would like to attempt this. On the first side I was tacking each fold before stitching down the binding. By the second side I had mastered the fold as I was stitching the binding but it was still difficult. By the third and fourth sides I had figured out how to pin each fold with small embroidery pins. 

HINT: I cut my bias binding 2" wide, planning a quarter inch seam. I also basted the binding on the seam line prior to machine sewing.


I HOPE THE PHOTOS WILL CLARIFY THE WRITTEN EXPLANATION.


1.  Stay stitch (I tacked the point with 3 stitches) and clip to the quarter inch seam line.


2. Pin binding in place, stretching the clip open and straight. 


Ease in the curves. This will prevent the bias from pulling and cause the curve to fold under. 


The points are folded just like the square corners of a rectangular quilt even though they are acute angles rather than a 45 angle.

3.  Baste and sew. Be sure to sew exactly through the clipped point. (I missed about 1/3 of the points and had to rip and resew.)


4.  On the front, tuck back a fold that lines up with the points. Pin only the front half of the fold.


5.  Turn to the back, pull the binding to the sewing line, allowing the tuck to remain at the fold.


6. Pin the point at the seam line. Hand sew the binding. Tack the folds as you sew.


Tuesday, March 12, 2013

WEDDING RING Finished, Wedding Quilt #3


 I finished quilting and binding this quilt for my granddaughter, Grace, just after her 1st birthday. I know that I'm a bit early but who knows what's ahead. I want her to have a special memory of her Grandmother.

Since there were no suggested quilting patterns, I selected two patterns to repeat in the open areas. I outlined each wedge within the arcs and shadowed the white shapes.

 I was concerned that the pencil lines would not wash out. I sprayed with a prewash stain remover and threw it in the washer and dryer (removing it while still damp) and all was good. It did press out the major wrinkles so the quilting would show better.


  • Someone suggested folding quilts on the basis to avoid fold lines. I opened the quilt to photograph it just before this post and still found some creases but in the long term, this may be less permanent.