Showing posts with label scallop edges. Show all posts

Friday, April 26, 2013

FANCY DISH finished, Wedding quilt #4


This quilt is for my grandniece, Vanessa for her wedding day. She is only 12, so I'm planning ahead. Who knows if I can still make these king size quilts when the time comes.


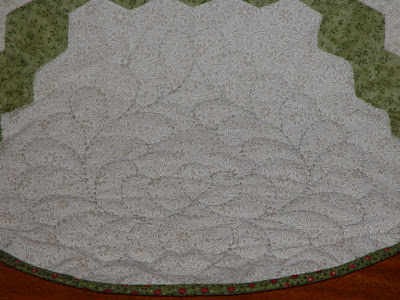
I knew that the binding on this scallop and point edge would be a challenge but I didn't realize how much of a learning curve it would be.

I have put a tutorial together to help those who would like to attempt this. On the first side I was tacking each fold before stitching down the binding. By the second side I had mastered the fold as I was stitching the binding but it was still difficult. By the third and fourth sides I had figured out how to pin each fold with small embroidery pins. 

HINT: I cut my bias binding 2" wide, planning a quarter inch seam. I also basted the binding on the seam line prior to machine sewing.


I HOPE THE PHOTOS WILL CLARIFY THE WRITTEN EXPLANATION.


1.  Stay stitch (I tacked the point with 3 stitches) and clip to the quarter inch seam line.


2. Pin binding in place, stretching the clip open and straight. 


Ease in the curves. This will prevent the bias from pulling and cause the curve to fold under. 


The points are folded just like the square corners of a rectangular quilt even though they are acute angles rather than a 45 angle.

3.  Baste and sew. Be sure to sew exactly through the clipped point. (I missed about 1/3 of the points and had to rip and resew.)


4.  On the front, tuck back a fold that lines up with the points. Pin only the front half of the fold.


5.  Turn to the back, pull the binding to the sewing line, allowing the tuck to remain at the fold.


6. Pin the point at the seam line. Hand sew the binding. Tack the folds as you sew.


Tuesday, March 31, 2009

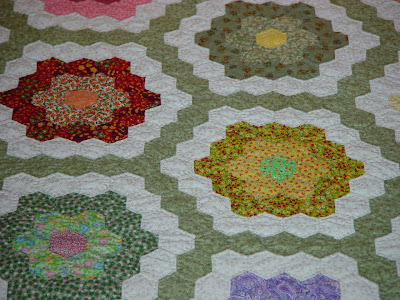
“BETTY BEE'S BOUQUET”, a Grandmother's Garden

My mother, Betty, was an incredibly creative person and a talented artist. Like most wives and mothers in the 40's/50's, she did not pursue a career outside the home but used her creativity to make clothes, decorate our home, and volunteer to be the artist/craft leader for all groups. Both my sister and I were in awe of her abilities but instead of intimidating us, she encourage us and supplied the materials and opportunities to follow her. This quilt is dedicated to her.

Most of the fabrics for this quilt came from her scraps. It contains memories of clothes she made for herself, my sister and I, and her granddaughters.

As I commented to Jackie, I didn't follow the conventional technique for grandmother's garden because I didn't know any better. As I cut the hexagons, I marked each corner with pencil. Matching these dots, I joined the seams with alternating running stitch and backstitch. I really found this less time and work intensive because I didn't cut paper templates, press under the seam allowance or baste. Maybe it wasn't the "right" way but it worked.

I hand quilted this queen size bed topper. The whole process took about 2 years with other projects in between. As of yet I have no granddaughters to pass on this heirloom so if my oldest son doesn't have any girls, it will go to our first granddaughter-in-law.

Thursday, March 19, 2009

“MON” Japanese Family Crests

Yae is a very special lady in my life. At age 80+ she still works as an aide at my school and is respectfully called Grandma by the students. Over the 20 years at South Pointe Middle School, I was blessed to have Yae worked with me at various times. Yae survived internment camp during WWII without bitterness, recovered from brain injury due to a fall, and continues to work daily with kids at risk. I designed and made this quilt with love and admiration for the person she is.

My design was base on "Diane's Garden" , a "stained glass" look achieved by fusing colorful pieces of fabric onto a black fabric background. I used Lite Steam-A-Seam2 to apply crest appliques to background, a double stick fusible web sandwiched between transparent papers. Applique design is 1) traced in reverse on paper liner 2) second paper liner is removed, 3) web side is ironed to wrong side of fabric, 4) design is cut out, 5) remaining paper liner is removed, 6) fabric cut-out is ironed to background fabric, 7) edge is machine appliqued using a blind hem stitch or zigzag.
Mons are Japanese family crests handed down from generation to generation through the female members of a family. I found these in books and online although I had to redesign them to minimize the number of parts and increase connections. After Yae received the quilt, she told me that her family has a crest. I wish I had know this ahead of time and could have used it too.

The day I decided to give Yae her gift turned out to be the one year anniversary of her husband's death. I didn't intend to cause her grief but unintentionally she said I made a sad day better.